Introduction
Taking your first flight can be both thrilling and nerve-racking. The thought of soaring thousands of feet above the ground, surrounded by people who seem to know exactly what they’re doing, can make any first-time traveller anxious. But here’s the truth — once you understand the process, flying becomes one of the easiest and most convenient ways to travel.
This air travel guide will walk you through every single step of air travel — from booking your flight to collecting your baggage after landing. By the end, you’ll know exactly what to do at every stage, ensuring your journey is smooth and stress-free. Whether you’re travelling domestically or internationally, this comprehensive guide will be your perfect flying companion.
We’ll cover everything from choosing your airline, understanding your ticket, packing like a pro, handling airport procedures, and even what happens once you’re inside the plane. So, take a deep breath — flying isn’t as complicated as it looks. Once you’ve done it once, you’ll wonder why you were ever nervous in the first place.
Table of Contents
Air Travel Guide: Understanding Your Flight Booking
Choosing the Right Airline and Flight as per the Air Travel Guide
Booking your first flight can feel like navigating a maze – dozens of airlines, multiple routes, confusing price differences, and all sorts of hidden fees. The best place to start is by deciding where and when you want to travel. Use reliable flight comparison sites like Google Flights, Skyscanner, or Expedia to see all your options in one place.
Look beyond just price. Consider the total travel time, layovers, baggage allowance, and cancellation policies. For shorter trips, budget airlines may offer cheaper fares, but they often charge extra for checked luggage, seat selection, or even meals. For longer or international flights, a full-service airline might be more comfortable and cost-effective once you include all extras.
Also, check the reputation of the airline – customer reviews on timeliness, comfort, and service can tell you a lot. Once you find a flight that fits your budget and preferences, book directly through the airline’s website if possible. It’s safer, and resolving any future issues becomes much easier.
Air Travel Guide: Help you Compare Flight Prices and Schedules
Not all flights are created equal, and neither are their prices. Airfares can fluctuate daily – sometimes even hourly. To snag the best deal, start tracking prices early (2–3 months in advance for domestic flights, 4–6 months for international).
Use flight comparison tools that allow you to set alerts for price drops. Be flexible with your dates and airports – flying a day earlier or from a nearby airport can often save you hundreds of dollars. Also, note that mid-week flights (Tuesday–Thursday) are usually cheaper than weekend departures.
When comparing schedules, look at the total travel time. A $50 cheaper ticket isn’t worth it if it means a 12-hour layover. Also, check the layover city – some require a visa even if you’re not leaving the airport. Always read the fine print before confirming your booking.
Reading Your Flight Ticket and Itinerary
Once your booking is confirmed, you’ll receive an e-ticket (electronic ticket) via email. This document is essential – it contains all the details about your journey. Key information includes:
- Passenger Name (must match your ID or passport exactly)
- Flight Number (identifies your specific aircraft and route)
- Departure and Arrival Airports
- Departure Date and Time
- Seat Assignment (if pre-selected)
- PNR/Booking Reference Number (for check-in or customer service)
Keep a digital and printed copy handy. Your itinerary might also include connecting flights, layover details, and baggage allowance. Make sure everything matches your travel plans – if you spot errors, contact the airline immediately.
Pro tip: Save your e-ticket on your phone and print one extra copy. Some airports still require printed versions, especially in regions where digital access is limited.
Air Travel Guide: Preparing for Your Flight
Documents You’ll Need for Air Travel
Before you even think about packing, make sure your documents are in order – because without them, you’re not going anywhere. For domestic flights, a government-issued photo ID (like a driver’s license or national ID) is usually enough.
As per the international air travel guide, you’ll need:
- A valid passport (with at least 6 months before expiration)
- A visa (if required by your destination country)
- A return or onward ticket
- Sometimes, travel insurance, hotel bookings, and proof of funds
Double-check entry requirements for your destination. Some countries also require vaccination proof or an electronic travel authorisation (like ESTA for the U.S.). Keep all your documents together in a secure travel wallet or folder, and make digital copies in case of loss.
Having your paperwork sorted early saves stress at the airport and ensures a smooth check-in. Remember: missing or incorrect documentation can result in denied boarding – and no one wants that on their first trip.
Packing Smart – Luggage Rules and Tips
Packing can make or break your travel experience. Airlines usually allow two main types of baggage: checked luggage and carry-on baggage. Checked luggage goes in the cargo hold, while carry-on stays with you inside the plane.
Each airline has its own weight and size restrictions. For checked bags, it’s often 20–23 kg (44–50 lbs). For carry-ons, around 7–10 kg (15–22 lbs). Always check the airline’s website before packing.
Here’s a quick packing checklist:
- Essentials: Passport/ID, wallet, phone, chargers, tickets
- Clothing: Pack according to the climate, with at least one change in your carry-on
- Toiletries: Use travel-sized bottles and pack them in a transparent zip bag
- Electronics: Keep cameras, laptops, and valuables in your carry-on
Roll clothes instead of folding to save space, and use packing cubes for better organisation. Always tag your bags with your name and contact info. Losing luggage is rare, but better safe than sorry!
What You Can and Cannot Carry
Airport security is strict, especially when it comes to what’s allowed in your carry-on. Liquids, gels, and aerosols must be in containers of 100 ml or less, all fitting inside a 1-litre clear zip-lock bag. Larger quantities go in checked luggage.
During Air Travel Guide, Prohibited carry-on items include:
- Sharp objects (scissors, knives, razors)
- Flammable materials
- Sporting goods (bats, golf clubs, etc.)
- Tools and heavy objects
For checked luggage, avoid packing valuables, electronics, or fragile items. Also, if you’re carrying medication, keep it in its original packaging and bring a doctor’s prescription if needed.
Knowing these rules will save you from embarrassing bag searches or confiscations at the security checkpoint. When in doubt, check the airline’s official website for the latest guidelines.
Air Travel Guide: Arriving at the Airport
When to Arrive for Domestic vs. International Flights
Timing is everything when it comes to air travel. Arriving too late can cause unnecessary panic and even missed flights, while arriving too early can lead to hours of boredom. So, what’s the sweet spot?
For domestic flights, arriving at the airport 2 hours before departure is usually enough. This gives you time for check-in, security checks, and locating your gate.
For international flights, you should arrive at least 3 to 4 hours before departure. International procedures like immigration, customs, and longer check-in lines take more time.
Here’s a quick time guide:
| Flight Type | Recommended Arrival Time |
|---|---|
| Domestic | 2 hours before departure |
| International | 3–4 hours before departure |
Arriving early lets you relax, grab a coffee, or browse duty-free shops without rushing. If you’re unfamiliar with the airport layout or travelling during busy seasons (like holidays), add an extra 30 minutes as a safety buffer. Remember: airlines typically close check-in counters 45 minutes before departure for domestic flights and 60 minutes for international. Once closed, there’s no exception — even if you’re standing right there.
Airport Entry and Initial Security Checks
The airport experience begins right at the entrance. Most airports have security officers or guards at the main entry point who may check your ticket (printed or digital) and a valid ID/passport. Keep them ready to avoid holding up the line.
Once inside, you’ll find large electronic boards displaying departures and arrivals. Look for your flight number to find out which terminal and check-in counter to go to. Airports can be massive, so don’t hesitate to ask airport staff for directions if you feel lost.
Many airports have initial security screening areas where bags go through an X-ray machine. Make sure you have no sharp objects or prohibited items to avoid delays. Always stay alert and keep your belongings close — airports are generally safe, but it’s best to stay cautious in crowded areas.
If you’re early, don’t worry. Most airports have comfortable lounges, cafés, and even free Wi-Fi, so you can settle down before check-in begins.
Locating Your Airline Check-in Counter
Once you’re through the entrance, it’s time to find your airline’s check-in counter. These counters are usually grouped by airline or alliance, and digital screens above each counter display the airline’s name and flight number.
If you’ve already checked in online and only have hand luggage, you can skip the counter and go directly to security. Otherwise, join the queue for your airline’s check-in counter. Keep your documents ready — your passport or ID, e-ticket, and sometimes visa or travel authorisation.
When it’s your turn, the airline agent will:
- Verify your identity and booking details.
- Weigh and tag your checked luggage.
- Print your boarding pass (if you don’t already have one).
- Direct you toward the security screening area or departure gate.
Make sure your bags are securely locked and tagged. If you have connecting flights, confirm that your luggage is checked through to your final destination. That way, you won’t need to collect and recheck it during layovers.
Air Travel Guide: The Check-In Process
Types of Check-In — Online vs. Airport Counter
Modern air travel offers multiple check-in options, making the process faster and easier.
Online Check-In:
Most airlines allow passengers to check in online 24–48 hours before departure. You can choose your seat, confirm your travel details, and even download or print your boarding pass. This is the most convenient option, especially if you’re travelling with only a carry-on.
Airport Counter Check-In:
If you didn’t check in online or need special assistance (like travelling with children or oversized baggage), head to the airline’s check-in counter. This process may take longer, especially during peak hours.
Self-Service Kiosks:
Many airports now have kiosks where you can scan your passport or enter your booking reference to print your boarding pass and luggage tags.
Whichever method you choose, make sure your details are correct before proceeding. Incorrect seat numbers or names can cause confusion later. Once checked in, your next stop is security — the gateway to the departure area.
How to Drop Off Your Luggage
Once you’ve checked in, you’ll need to drop off any checked luggage. The process is simple but important. The airline staff will weigh your bags, ensure they meet the weight and size restrictions, and tag them to your final destination.
Here’s what you need to know:
- Each bag should have a luggage tag with your name, address, and contact number.
- Keep essentials, valuables, and electronics in your carry-on.
- Don’t pack items you might need before landing (like medication or chargers) in your checked luggage.
- Follow the airline’s weight policy strictly. Overweight bags may incur extra fees, sometimes quite hefty.
After your bags are checked, you’ll receive a baggage claim tag — keep this safe. You’ll need it to identify your luggage at your destination. Once done, you’re officially ready to head toward security and boarding.
Getting Your Boarding Pass
Your boarding pass is your ticket to board the plane. Whether printed or digital, it contains essential flight details such as:
- Passenger name
- Flight number
- Boarding gate and time
- Seat number
- Departure and arrival airports
Always double-check your gate number and boarding time, as these can change due to operational reasons. Keep your boarding pass handy because you’ll need to show it at security, immigration, and while boarding.
Pro Tip: Take a photo of your boarding pass on your phone in case you misplace it. Also, some airports have multiple terminals — ensure you’re in the correct one before proceeding to security.
Air Travel Guide: Security Screening and Customs
What to Expect During Security Checks
Security screening can seem intimidating, especially for first-timers, but it’s a simple process once you know what to expect.
You’ll place your carry-on luggage, electronic items, and any metal objects into trays for X-ray scanning. You’ll also walk through a metal detector, and in some cases, security staff may perform a brief body scan or pat-down.
Here’s what to remove from your bag before screening:
- Laptops, tablets, and cameras
- Liquids in transparent zip bags
- Jackets, belts, and sometimes shoes
Don’t panic if your bag is pulled aside — it’s usually for routine inspection. Stay polite and cooperative; security officers are just doing their jobs. Once cleared, collect all your belongings promptly and make sure you don’t leave anything behind.
Tips for Smooth Security Clearance
The key to breezing through airport security is preparation. Here’s how to make it quick and easy:
- Wear easy-to-remove shoes — you may need to take them off.
- Empty your pockets before reaching the conveyor belt.
- Keep electronics accessible for quick removal.
- Follow the 100ml liquid rule strictly.
- Avoid carrying restricted items to prevent unnecessary delays.
Remember, airport security staff appreciate passengers who are organised and cooperative. A smile and a respectful attitude go a long way. Once you’re through, take a moment to repack neatly and double-check your belongings before heading to the departure area.
Customs for International Travellers
If you’re travelling internationally, you’ll pass through customs and immigration either before departure (in some countries) or upon arrival. Customs officers may check your luggage or ask questions about your trip’s purpose, duration, and what you’re carrying.
Here are a few tips to handle customs confidently:
- Declare any restricted or high-value items honestly.
- Don’t carry food, plants, or animal products unless permitted.
- Keep receipts for expensive goods like electronics or jewellery.
- Stay calm and answer questions politely.
Trying to hide or lie about restricted items can lead to fines or legal trouble. Transparency and cooperation make the process quick and hassle-free.
Air Travel Guide: Navigating the Departure Area
Understanding Airport Signage and Gates
Once you’ve cleared security, welcome to the departure area — often the most exciting part of the airport. This is where travellers relax, eat, shop, and wait for their flights. It can also be overwhelming for first-timers, as airports are large and filled with signs, announcements, and gates.
Start by finding a large digital departure board. These screens display all upcoming flights, their gate numbers, and boarding times. Look for your flight number, then note the gate and status (like “On Time,” “Boarding,” or “Delayed”).
Airports use plenty of universal signs, often colour-coded for clarity:
- 🛫 Gates/Departures – usually marked with an aeroplane icon
- 🧳 Baggage Claim – suitcase icon
- 🚻 Restrooms – male/female icons
- 🍔 Food & Drinks – fork and knife symbols
- 💺 Lounges – seat icon
Follow these signs carefully — many gates are far apart and may require walking or taking a shuttle train. Always stay aware of announcements, as gate numbers can change at the last minute.
If you’re early, find your gate first, then explore nearby cafés or shops. That way, you won’t risk getting lost when boarding begins.
What to Do While Waiting for Your Flight
Waiting at the airport can be surprisingly enjoyable if you plan it right. Modern airports are like mini cities — offering everything from restaurants and spas to free Wi-Fi and charging stations.
Here’s how to make the most of your time before boarding:
- Grab a meal or snack: Aeroplane food can be hit or miss, so a quick bite before boarding is a good idea.
- Stay hydrated: Airports can be dry, and flights even more so. Carry an empty water bottle and refill it after security.
- Charge your devices: Make sure your phone, tablet, or laptop is fully charged before boarding.
- Explore duty-free shops: Great for buying perfumes, chocolates, or souvenirs tax-free.
- Relax: Find a comfortable seat, read a book, or listen to calming music.
If you’re travelling internationally, make sure to stay near your gate about 45 minutes before departure. Airlines usually start boarding 30–40 minutes before takeoff, and missing the call could mean missing your flight entirely.
Boarding Announcements and Gate Procedures
When your flight is ready to board, you’ll hear announcements or see “Now Boarding” displayed on screens. Boarding usually happens in groups or zones, indicated on your boarding pass. Airlines use this method to manage passenger flow and avoid chaos inside the aircraft.
Here’s what typically happens:
- Priority boarding – for first class, business class, and families with small children.
- Group or zone boarding – for passengers in different seat sections (e.g., back rows first).
- Final call – the last chance to board before the gate closes.
When your group is called, join the line with your boarding pass and ID/passport ready. The gate agent will scan your pass, and you’ll either board directly through a jet bridge or take a shuttle bus to the aircraft.
Double-check your seat number before entering the plane. Once you step aboard, flight attendants will welcome you and guide you toward your section. Congratulations — you’re officially moments away from takeoff!
Air Travel Guide: Boarding the Aircraft
Boarding Groups and Procedures
Boarding can seem chaotic, but it follows a specific order designed to keep things efficient. Most airlines board passengers based on seating zones, starting from the back of the plane to the front.
Listen carefully to announcements, and don’t rush to the gate if your group hasn’t been called yet. Pushing ahead only slows down the process. When your turn arrives, present your boarding pass (printed or on your phone) and ID to the gate staff.
As you step onto the plane, a flight attendant will greet you. You’ll notice rows of seats labelled with numbers and letters — for example, 12A or 18C. Your boarding pass shows exactly where to sit.
Pro tip: If you have a carry-on bag, stow it in the overhead bin directly above your seat, wheels-first. Keep smaller items like a book, headphones, or snacks in the seat pocket or under the seat in front of you. This keeps the aisle clear and helps boarding finish faster.
Once everyone’s seated, the cabin crew will make announcements about safety and flight details. Sit back, fasten your seatbelt, and prepare for an unforgettable experience — your first flight is about to take off!
How to Find and Store Your Seat Luggage
Finding your seat is simple: look for the row numbers printed above the overhead bins and match them with your boarding pass. Each seat row has letters (A, B, C, etc.) corresponding to positions — A for window, B for middle, and C for aisle (in smaller planes).
Once you locate your seat:
- Place your carry-on in the overhead bin above your row.
- Keep essentials like your phone, headphones, or travel pillow within easy reach.
- Avoid storing heavy bags under the seat — it’ll cramp your legroom.
Remember, overhead space fills up fast, especially on full flights. If your bag doesn’t fit, a flight attendant may move it to another bin or check it into the cargo hold. Don’t worry — they’ll tag it and return it at your destination.
Be considerate when placing your luggage — avoid crushing other passengers’ belongings. Once seated, buckle up and relax. The hardest part is over!
Meeting the Cabin Crew and Flight Safety Briefing
Before takeoff, the cabin crew will perform a safety demonstration. Pay close attention — even if you’ve seen it before, small details like emergency exits or life jacket locations vary between planes.
The flight attendants are trained professionals responsible for your comfort and safety. Need a blanket, headphones, or help with your seatbelt? Just ask politely. They’re there to assist.
You’ll also hear announcements from the captain or co-pilot, providing details like flight duration, altitude, and weather conditions at your destination. Once the plane begins taxiing to the runway, ensure your seatbelt is fastened, tray table is stowed, and window shade is open.
Takeoff can be a bit noisy and thrilling — engines roar, the plane speeds up, and suddenly, you’re airborne! That first moment when the ground disappears beneath you is pure magic. Don’t worry if your ears pop; swallowing or chewing gum helps.
Congratulations — you’ve just taken off on your first flight!
Air Travel Guide: During the Flight
In-Flight Comfort Tips for Beginners
Once you’re in the air, comfort becomes key. Even short flights can feel long if you’re not relaxed. Start by adjusting your seatbelt so it’s snug but comfortable — you’ll need to keep it fastened whenever seated.
For longer flights, wear loose clothing, stretch your legs occasionally, and stay hydrated. Aeroplane cabins are pressurised but dry, which can lead to dehydration and fatigue. Drink plenty of water and avoid too much caffeine or alcohol.
Bring along comfort items like:
- A neck pillow for better sleep
- Noise-cancelling headphones or earplugs
- A light blanket or shawl (some airlines provide one)
- Lip balm and moisturiser for dry air
If you’re in a window seat, enjoy the incredible view — cloudscapes, sunsets, or even the city lights below. For aisle seats, you’ll have easier access to the restroom and can stretch more easily.
Air travel can feel magical or monotonous depending on how you spend the time — so relax, watch a movie, or read that book you’ve been putting off.
Using Entertainment, Meals, and Restrooms
Most airlines offer in-flight entertainment systems on screens mounted on seatbacks or available through personal devices. You can enjoy movies, TV shows, music, and games for free or a small fee, depending on the airline.
For meals, airlines usually serve based on flight duration. Short domestic flights might offer snacks and drinks, while international ones include full meals. You can request special meals (vegetarian, halal, gluten-free, etc.) when booking your ticket or at least 24 hours before your flight.
Restrooms, or “lavatories,” are usually located at the front and rear of the cabin. Wait until the seatbelt sign is off before standing. Always lock the door and keep your visit brief — there’s usually a line on longer flights.
After the meal service, the lights may dim for rest time. You can nap, but keep your seat upright during meal service and landing. Remember to be courteous — avoid reclining suddenly, keep noise to a minimum, and respect your seatmate’s space.
How to Handle Anxiety or Motion Sickness
It’s perfectly normal to feel nervous on your first flight. If you experience anxiety or motion sickness, here are some practical tips:
- Focus on breathing: Deep, slow breaths calm your body and reduce nervousness.
- Avoid heavy meals before flying — an empty or overly full stomach can worsen nausea.
- Stay hydrated, but limit caffeine and alcohol.
- Listen to calming music or a guided meditation.
- Ask for help — flight attendants are trained to assist nervous flyers.
For motion sickness, choose a seat near the wings (where movement is minimal), look out the window to stabilise your sense of balance, and bring anti-nausea medication if needed.
Remember, turbulence — those little bumps midair — is completely normal and safe. Planes are designed to handle it effortlessly. Think of it like driving over a slightly bumpy road in the sky!
Understanding the Landing Process
As your plane descends, you’ll start to feel a gentle change in pressure and perhaps notice your ears popping again — this is completely normal. The captain will announce the expected landing time and the weather at your destination. Make sure your seatbelt is fastened, tray table is up, and seat back is upright.
When the aircraft touches down, resist the urge to unbuckle right away. The seatbelt sign will remain on until the plane completely stops and the doors open. Flight attendants will make announcements about baggage claim areas, connecting flights, or customs procedures.
Once the doors open, passengers typically exit row by row. There’s no need to rush — take your time collecting your belongings from the overhead bin. Before stepping off the plane, double-check the seat pocket and floor for your phone, passport, or any small items.
If you have a connecting flight, follow the signs for “Transfers” or “Connecting Flights.” If this is your final destination, follow the signs for Arrivals or Baggage Claim.
That’s it — you’ve successfully completed your first air journey! But your travel experience isn’t over just yet — next comes immigration and baggage claim.
Going Through Immigration (For International Flights)
Immigration is where you officially enter your destination country. You’ll present your passport, boarding pass, and sometimes a landing card (a small form with personal and trip details).
Here’s what typically happens:
- You’ll stand in line and approach an immigration officer.
- They’ll ask a few basic questions like:
- “What is the purpose of your visit?”
- “How long do you plan to stay?”
- “Where will you be staying?”
- They’ll check your documents, possibly take your photo and fingerprints, and stamp your passport.
Always answer questions politely and truthfully. Immigration officers are not trying to scare you — they’re ensuring all travellers meet entry requirements.
If you have connecting flights, you may not go through immigration until you reach your final destination (depending on your route). Follow the “Transit” signs and confirm with airline staff if you’re unsure.
Once cleared, head toward Baggage Claim to collect your luggage.
Collecting Your Baggage
At baggage claim, look for electronic screens listing flights and their corresponding carousel numbers. Find your flight number, then head to the matching belt.
While waiting, you’ll see bags appear on the conveyor belt. Don’t rush — let others collect theirs calmly. Match your luggage tags with the baggage claim tag given at check-in to ensure you’re picking up the right one.
If your bag doesn’t arrive, don’t panic. Go directly to the airline’s baggage service desk near the carousels and report it. They’ll track it using your tag number and usually deliver it to your hotel or home within a few days.
Once you’ve collected your luggage, you’ll proceed through customs (for international flights). If you have nothing to declare, follow the “Green Channel” sign; if you’re carrying items that must be declared (like goods exceeding the duty-free limit), go through the “Red Channel.”
Congratulations — you’ve officially landed and completed the arrival process!
Air Travel Guide: After Landing, Exiting the Airport
Customs Declaration and Security Checks
Customs checks are the final step before leaving the airport. Officials may randomly inspect bags or ask questions about what you’re bringing into the country. If you’re carrying expensive electronics, food items, alcohol, or large amounts of cash, it’s best to declare them honestly.
Here’s how to make this step stress-free:
- Keep your passport and baggage claim tag handy.
- Know the duty-free allowance limits of your destination (these vary by country).
- Declare restricted or high-value items to avoid fines or confiscation.
- Be polite and answer questions clearly.
Most travellers pass through without any checks, but being prepared ensures you won’t face surprises. Once you’re through customs, follow signs for “Exit”, “Arrivals,” or “Ground Transportation.”
Meeting Your Pickup or Transportation Options
Once you exit the customs area, you’ll typically arrive at the arrivals hall — a busy area filled with drivers, family members, and hotel representatives holding name signs.
If someone’s picking you up, look around for their sign or call them once you’re outside. Many airports offer free Wi-Fi, so you can easily connect and send a quick message.
If you’re on your own, you have several transportation options:
- Airport Taxis: Official taxi counters inside the terminal ensure fair pricing.
- Ride-Sharing Apps: Services like Uber, Lyft, or Grab are available at most major airports.
- Public Transit: Buses, metro, and airport trains are budget-friendly and efficient.
- Airport Shuttles or Hotel Transfers: Often arranged in advance through your hotel.
Always check official counters and avoid accepting rides from unauthorised drivers. Once you’ve arranged your transportation, take a moment to relax — you’ve completed all the major airport procedures!
Tips for Smooth Airport Exit
Leaving the airport smoothly is all about being organised. Keep these final tips in mind:
- Keep your passport and wallet in a secure spot — airports can be crowded.
- Double-check you have all your belongings before leaving the terminal.
- Use official currency exchange counters if you need local cash, but don’t exchange large sums — airport rates are often higher.
- Follow signs for “Exit” carefully to avoid ending up in the wrong terminal area.
- Take a moment to celebrate — your first air travel experience is now officially complete!
Whether you’re heading to a hotel, friend’s place, or tourist destination, give yourself a pat on the back. The process that once seemed intimidating is now something you’ve mastered step by step.
Air Travel Guide: Common Mistakes First-Time Flyers Make
Forgetting Important Documents
One of the most common rookie mistakes is forgetting crucial travel documents. Without proper identification or visas, airlines simply can’t let you board. Before you leave home, triple-check your essentials:
- Passport or government-issued ID
- Visa (if required)
- Printed or digital flight ticket
- Boarding pass (if checked in online)
- Hotel reservations or travel itinerary
A great trick is to store all important documents in a travel pouch or folder. Keep both digital and printed copies in case of emergencies. Losing your passport abroad can be stressful — so handle it like treasure.
Overpacking or Carrying Prohibited Items
Another major mistake is packing too much or including items not allowed in carry-on luggage. Many first-time travellers bring their whole closet — but airlines have strict baggage limits, and overweight bags can result in hefty fees.
To avoid this:
- Pack only what you’ll actually use.
- Stick to light, mix-and-match clothing.
- Follow the 100ml liquid rule for carry-ons.
- Avoid packing restricted items like scissors, aerosols, or lighters.
Packing smart not only saves money but also makes your travel experience easier and stress-free.
Arriving Late or Missing Boarding Time
Even the most seasoned travellers can occasionally cut it close — but for first-time flyers, arriving late is a disaster waiting to happen. Airlines strictly close check-in and boarding gates before departure.
To avoid missing your flight:
- Arrive early (2 hours domestic, 3–4 hours international).
- Set reminders for boarding time on your phone.
- Stay near your gate after security.
Once the gate closes, even being five minutes late can cost you your flight. Treat time like gold when travelling by air.
Pro Travel Tips from Air Travel Guide for First-Time Flyers
How to Make Your Journey Comfortable
Travelling by air doesn’t have to be tiring. Small adjustments can turn your trip into a pleasant experience.
- Dress comfortably in layers to adapt to changing cabin temperatures.
- Stay hydrated — bring a reusable bottle and refill it after security.
- Carry snacks like granola bars or nuts for energy.
- Move around every few hours on long flights to prevent stiffness.
- Download entertainment ahead of time in case the plane’s Wi-Fi is spotty.
Your goal is to enjoy the journey, not just reach the destination.
Staying Calm and Organised Throughout the Trip
Organisation is your best travel companion. Keep your travel documents, wallet, and phone in easily accessible spots. Use packing cubes to separate items in your luggage.
Calmness is equally important. Unexpected delays, security checks, or long queues happen — stay patient. Airports are designed to air travel guide you step by step, so even if you feel unsure, there’s always help nearby.
Apps and Tools That Make Air Travel Easier
Technology can make air travel smoother than ever. Consider downloading these helpful apps:
- Airline Apps (check-in, boarding passes, flight status)
- Google Maps (airport navigation)
- TripIt or App in the Air (organise itineraries)
- XE Currency (track exchange rates)
- Google Translate (for language assistance abroad)
Having these at your fingertips reduces stress and keeps you informed every step of the way.
Conclusion
Your first flight is a milestone — one that opens up a world of new experiences, cultures, and opportunities. While the process may seem complicated at first, it’s really just a series of simple, organised steps.
From booking and packing to boarding and landing, each stage becomes easier with practice. The key is preparation — knowing what to expect removes fear and builds confidence.
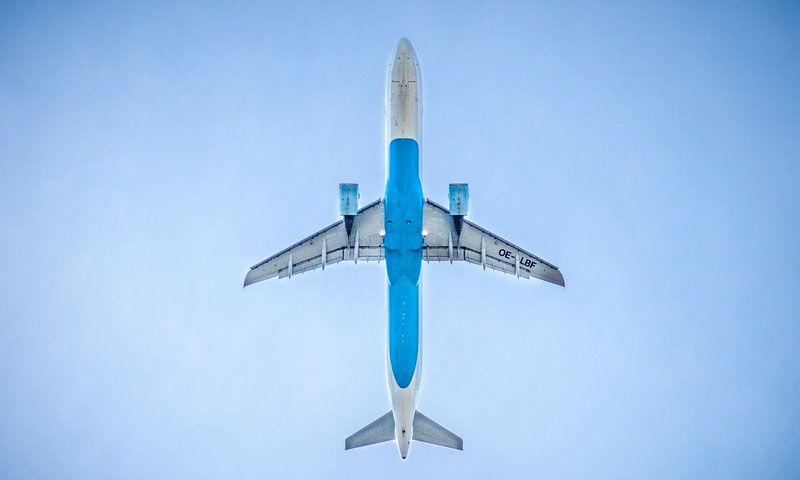
So the next time you see a plane soaring above, as per the air travel guide, remember – that could be you, ready for your next great adventure. Flying isn’t just travel; it’s freedom.
FAQs
How early should I reach the airport before my flight?
As per the air travel guide, arrive at least 2 hours early for domestic flights and 3–4 hours early for international flights.
What items are not allowed in hand luggage?
Liquids over 100ml, sharp objects, lighters, and flammable materials are not allowed in carry-ons.
Can I carry snacks or water during air travel?
Yes, solid snacks are fine. You can bring an empty bottle and fill it with water after security.
What happens if I miss my flight?
Immediately contact your airline. Some may rebook you for a fee, depending on availability and ticket type.
How do I handle jet lag after flying long distances?
Stay hydrated, get sunlight exposure, and try to adjust to the new time zone gradually.